Friday, September 28, 2007

Pumpkin show

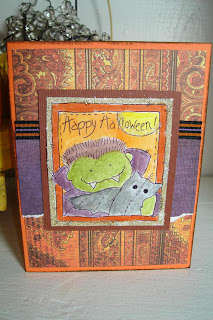
Little pumpkins, all in a row, putting on a pumpkin show! I'm sorry I keep posting these Crafty Secrets Vintage Halloween cuts. I know there's really no stamping or skill involved but I just love the look of them with glitter! Crafty Secrets puts such fun, playful sayings on them, they are irresistible to me. I'm begging Sandy to do a Halloween stamp set for next year. This is actually a double post it note holder that I bought at Michaels for .50 on clearance a while ago. I just added some Crafty Secrets paper and ribbon, and stamped it with my fave. Cherub swirl. I need to score some more of them so my Mom can give them to her bridge club for Halloween.

Here's the inside of the holder. I may have to make a stop at Michael's and see if they have any left tonite. I'm heading out the door to go to a girlfriend's house for a bonfire and drinks, and then tomorrow I'll head up to the lake to do some junking. Junk season is almost over, I'm trying to get it out of my system before winter comes to MN and we're cooped up inside! I'll bring my camera just in case there's any exciting junk to post. Have a junky weekend, everyone! :)

Thursday, September 27, 2007

Halloween goes Caribbean

While working Scrapfest a few weeks ago, I ran across this Rhonna Farrer "C'est Magnifique paper at Archivers. Tonite I was inspired to use it on Halloween cards because I'm in an orangey mood. I think it works o.k. for Halloween cards...what a surprise!Sometimes I just get tired of using the same colors over and over again. So tonite Halloween goes Caribbean blue & orange, mon.
I've been experimenting with the Spellbinders Nestability Ovals that I bought from Ellen Hutson's store. The thing I really like about them is that they can be placed in the center of your paper to create frames, unlike the Marvy punches. So I set to work framing up these cards. Another fun thing to do is to run your paper through a cuttlebug embossing folder after cutting out the center. It gives it texture, and made the plain orange cardstock all matchy matchy with the Rhonna paper. I distressed the only orange paper with pumpkin pie ink to make the embossing stand out. Here's a photo of the embossing before distressing it. I still love this pumpkin-in-the-cemetary image from the Stampin Up set "Spooktacular Greetings". The witchy legs are from Stampendous, and the black cat image is from a new westrim set called "Halloween Boogie". Another look that I LOVE is faux stitching and doodling around the outside of your images. Since I'm doodling challenged, I love that you can use the spellbinder die as a template for your stitching or doodling. Just leave your paper in the die and trace, stitch or doodle following the template edge.

So that's what I know for tonite, other than the fact that it's the SEASON PREMIERE of GREY'S anatomy! GOTTA GO! :)

Wednesday, September 26, 2007

Junkin it up

Tonite's post centers around $5.00 worth of junk that I bought last weekend at junk sales. We got a late start and headed out into the countryside for a yard sale that listed "antiques". By the time we got there, there had already been antique dealers buying up stuff left and right. BUT I STILL SCORED! The little muffin tin was .25, and the stamps were $1.00 each! I love the new Stampin Up bucking bronco set, but wasn't willing to invest in the set because I wasn't sure that I'd really get that much use out of it. So for a dollar at a yardsale, I got a great bronco image similar to SU that I can use for masculine cards. I LOVED the other stamp too, the New-Years Eve hats. They look so vintage to me, and since I was in Halloween mode, I thought I'd try to turn it into a halloween stamp by coloring in the hats orange, etc. Sometimes my out-of-the box thinking doesn't fly. Here are the cards I ended up doing with the New Year's stamp, trying to pass them off as vintage halloween party cards! I thought they turned out cute but then I brought them into work to see if anyone would notice that it's a new years stamp, and they did. So back to the drawing board. Tonite I pulled the main images off the party hat cards and substituted witchies instead. Some stuff flies, some doesn't~! Oh well. The important thing really is to experiment with what you have, and not be afraid to fail. Sometimes the best ideas come out of nowhere! So here are the witchies instead. The witchies are from Stampin Up sets, "Booglie Eyes" and "Spooktacular Greetings". Stampin Up always has the BEST Halloween sets. The black polka dot paper is Bo-Bunny Romance Dots and the orange patterned paper is Autumn Leaves, Orange Twist. The orange paper already has the scallopy edge, so I just cut the paper to fit my cards, leaving the edge intact. The swirls are Autumn Leaves Swirl Version 2.


The little pointy antique looking things are floral "frogs". They go in the bottom of a vase, and you stick your flower stems in them. I use them for card display, you can easily prop a card in between the points and display your cards on cake plates or shelves. I paid .50 cents for the small frog and a dollar for the larger one.
I ended up purchasing the Spellbinders Nestabilities Oval Dies from Ellen Hutson and am just starting to play around with them. I have some ideas brewing that I have started on that I'll show you tomorrow night. I have SO many projects going right now, I need a play day so I can complete everything! I still have some stuff to post from last week that I was using the soldering gun on. Soon, very soon! :)

Tuesday, September 25, 2007

Inky Antics & painted stepstool!


Here are a few more images that I watercolored last weekend at the cabin. I'm in USE IT UP mode again, so I'm using Daisy D's papers from last year that I got from a freebie Archivers paper pack. The images are Inky Antics stamps that were stamped off for me by friend Lana Lepinski. The little pom-pom trim is from Archivers...completely and totally inspired by Vicki Chrisman. I'm still in glitter mode, so the edges of these are glittered up with brown glitter and Martha Stewart yellow-gold. OH MAN! I have PURPLE glitter too! Why don't I break that out with some of this purple paper! The swirl is from Autumn Leaves, Swirl V2.


I also wanted to show you guys the $5.00 stepstool that I painted last night. It goes perfectly in my bedroom!
Here's what it looked like before the paint job! I used leftover paint from the porch painting project. Tomorrow night: more junk buys from last weekend.

Monday, September 24, 2007

Different on paper.


These started of SOOOO different in my head. I wanted to experiment with my Tim Holtz alcohol inks, and this is what I ended up with. In my head they were WAY better!

For the focal images, I started out with a Tim Holtz applicator tool/handle and a felt pad, and started dabbing colors onto glossy paper. I used Pesto, butterscotch and oregano green. Then I added gold metallic mixative and went over the top of the colors, which gave the paper a pretty gold shimmer. I stamped my pumpkin and leaves in black ink over the top of the glossy paper, and colored them in with Stampin up markers. The pumpkin still didn't pop out much, so I added metallic copper stickles to it to make it shimmery.

For the card layout, I wanted the card to look like a big "TICKET PUNCH" layout, with the corners cut out. So I took 2 patterned papers, (Orange Citrus dot Bo-Bunny, and Bo Bunny Shabby Princess pep rally plaid), cut them to measure 4" x 5 1/4", and put both pieces of paper together on my sizzix machine. I took a spellbinders oval scallop die, and die cut just the corners. After I was done, I interchanged the corners so that the plaid paper had orange corners, and vice versa. The stamp set is "Give Thanks" by Stampin Up.
I will probably experiment with this layout again, using different stamps..I think a square focal image will work out better. I also will leave off the ribbon corners.


Sunday, September 23, 2007

Trick or Treat, smell my feet

Oh man. Remember running around the house yelling: "TRICK OR TREAT, SMELL MY FEET, GIVE ME SOMETHING GOOD TO EAT"! The funniest part is that we thought it was hilarious every time we said it. At our stamping retreat a few weeks ago, we did an image swap. We each stamped off 2 images and then lined them all up in a row & swapped images. With over 20+ participants, we each ended up with over 40 different images to play with. What a cheap way to make the most of your rubber stamp money! SHARE THE LOVE!


This image is a new "Stampendous" Halloween image that Joy from Eclectic Paperie stamped off for the swap. It's called "Treat Bag Trio". I wanted to give this card a little jazz, so I added "Smell my Feet" with my letterpress letters. The swirl is by Autum Leaves (Swirls v.2) and is stamped in black brilliance ink. The paper is K & Company "Happy Trails Checked Stripes Flat Paper". I don't think it's meant to be Halloween paper, but I loved the browns and oranges in it. I ran a stripe of Martha Stewart Yellow gold glitter down one of the stripes to make the paper glittery.

There's a reason I haven't been posting much cutesy stuff lately.... first, I've been obsessed with the Crafty Secrets vintage halloween images, and secondly, I've got it in my head that I need to color cutesy images with copic markers. I've always watercolored all of my images, but after playing copic at the retreat, I'm feeling the need to color in solid colors on all of my cutesy stamps! So I took the plunge and ORDERED COPICS! I'll be posting lots more cutesy once they arrive. So this weekend was completely productive for me. Bedroom painted? Check. Laundry done? Check. Housework, vaccuming, dishes, misc errands? Done. So this week I'm going to slack off and make cards every night. Hope you had a great weekend!

Friday, September 21, 2007

Halloween Cat Chipboard Book

********

So you're going to be on Halloween overload after perusing all of the photos on tonite's post. I promise this is the only scrapbook I'll make you look at! I bought this little Maya Road Chipboard Cat album at a local scrapbook store that was going out of business. It was so CHEAP! It retails for $4.99 and I got 30 percent off! Practically free!

I knew it had Crafty Secrets written all over it, so I altered it at the cabin last weekend. All products are from Crafty Secrets. I pulled every single Halloween image I had from their Halloween Cuts , Halloween Stickers and the Seasonal booklet, and then altered a lot of the patterned paper from the "Earthy"pad using the little script writing from the "Journaling" set. The swirl is from the "Cherubs" set. I've been using it on EVERYTHING lately! I love using it with the Black Brilliance Ink I got at Archivers.

I'm trying to paint the spare bedroom (Joy & Cami's bedroom!) this weekend. I'm hoping to finish tomorrow sometime so I can have the rest of the weekend to create! Aaaack, I have to load all these pages over at the Crafty Gallery too! GEEZ! I BETTER GET BUSY:)


Wednesday, September 19, 2007

Flounced edges.

Ok, now for the flounced edges.
These are even easier than the rosettes!
Spray glimmer mist (Tattered Angels) on your crepe paper, then run a heat gun over the top of the crepe paper. Dries VERY quickly and no worries about wrinkling! It's CREPE paper, it's SUPPOSED to be wrinkly! YAY! Friend Carol Halvorson had a GREAT idea about how to "glimmer mist". Take a BOX and put your paper inside the box and SPRAY AWAY! No need to worry about ending up with a glimmery carpet or desk by using this technique. :) Anyway, get your crepe paper shimmered up & dried, then run a line of hermafix or adhesive along the back edge of your paper.


Starting at the edge, stick the crepe paper onto the adhesive, crimping it as you go. Run it along the entire edge of the paper.


DONE! Add it to your focal images or on your background for card layouts. Reminds me of a dust ruffle on a bed.


Here I've used it like ribbon, to separate the 2 patterned papers I used on this card.


These images are actually Crafty Secrets "Halloween Treats" STICKERS. I turned them into main images by using my aged background blocks from Hero Arts. If you have the Stampin' Up "Sanded" background, you can get the same effect. The stamped elements are a sneak peek from a new set that Crafty is coming out with soon. The black swirl is from the "Cherubs" stamp set. I just got black brilliance ink from Archivers and I am in love with how much the black pops on patterned paper. I guess I just love a fresh new ink pad in general!

Tuesday, September 18, 2007

Crepe Paper Rosettes

Yesterday I showed you my inspiration for all of the cards I've been making recently, in my walking pneumonia induced stupor. I wanted to show you how easy it is to make the rosettes that I've been adding to everything. The rosettes are so fun to make, and the beauty of it is, you probably already have crepe paper in your party supply stash from birthday parties, etc. I had a bunch of black and orange in my halloween decoration stash from a party we had 5 years ago...don't buy new, just use what you have! White works great too...I glimmer misted ( by Tattered Angels) the white and turned it into terra cotta orange! You'll just need a needle and thread (any color), and your crepe paper. I started by spraying my crepe paper with glimmer mist to give it a shimmery coating. Take your heat gun and immediately run it over the crepe paper to dry it (it drys BEAUTIFULLY!). Then cut the crepe paper into skinny, 1/2 inch strips, 1/2" wide by 6" long. You can experiment with different widths...the wider the strip, the bigger the rosette. Take your needle and thread and do a running stitch through the length of the crepe paper, at the edge. Gather the ends together and pull until it forms a circle.


Tie it off by making a couple of knots. This will not show, so don't worry about the thread color. Turn the rosette over and put a few dabs of liquid glue in the center. Choose a glitter color and dump it on the glue. EASY!


Think of the possibilities...the white crepe paper could be STAMPED instead of glimmer misted! OH MAN! I need to go play with these again! Ok, move it along, Lisa.


Here's a shot of the crepe paper with glimmer mist added, so you can see the difference it makes. These 3 colors were spritzed with walnut gold glimmer mist. Have you guys SEEN the new fall glimmer mist colors?! I'm freaking out. I just ordered 2 more Glimmer Mist colors from Eclectic Paperie last Friday, and now I need to go back and order more because they added the fall and winter colors! I'm SO ALL OVER the mistletoe, holly berry, snowflake, harvest orange & SUGAR COOKIE!

This card was made with the Crafty Secrets "Seasonal" Booklet images. The paper is from the "Earthy" paper pad. Martha Stewart Yellow gold glitter. The "Halloween Cutie" image is from the Halloween vintage cuts. Swirls are from the Cherub set.

Tomorrow night: FLOUNCY CREPE PAPER EDGES!

Monday, September 17, 2007

Happy Birthday, Mum!

Today is my Mom's 65th birthday! She's celebrating today by decorating the house for Halloween. This year was sort of low key for her...we usually celebrate September birthdays (Mom, Aunt Jan & Grammie) by going to Junk Market's junk sale in Long Lake, MN, but this year it was held on a different weekend. So instead, we will celebrate in October when we have a girls weekend planned to go junking in Buffalo, MN & visit the town that my Grandma grew up in.

I couldn't wait to show you guys the gifts that I bought her at Patina when I was waiting to get my tires put on. I fell in LOVE with this BLACK hobnail CAKE PLATE as soon as I set foot in Patina's door. I knew that my Mom, who is gifted with an unbelievable talent for decorating her log home, would LOVE it for displaying treats or fun Halloween decorations. THEN, I spied the cute little witchy- poo riding the crow! This chicky has given me a weeks worth of inspiration for my Halloween cards. If you look at the close-up of the witch, there are 3 elements that I pulled from her to create cards. I was inspired by her vintage newspaper hat, the sparkly crepe paper rosette on her outfit, and the vintage glitter center of the rosettes. My card posts this week will all center around these elements, using Crafty Secrets vintage Halloween images. I've been going crazy with the glimmer mist all weekend.. I've been spraying the heck out of crepe paper and rosettes, and I LOVE the effect it has on the crepe paper. Here's a closeup so that you can see the glimmer up close and personal. I used the terra cotta color on white crepe paper and got a shimmery, antiquey looking orangey-gold color. The swirl is from the Cherubs set. Martha Stewart yellow-gold glitter decorates the edges of the paper and the rosette middles. Tomorrow night I'll do a tutorial for you on making crepe paper rosettes... I just need to sit down and take some pics for you.


Have a great evening, everyone, and Happy Birthday, Mom!


L.